I Just Bought a Launch Monitor - Now What? Your Complete Golf Simulator Setup Guide
Just got a launch monitor? Here's exactly what you need to set up a home golf simulator — software, screen, projector, mat, and PC — in the right order.

Congratulations. You just pulled the trigger on a launch monitor — a Mevo+, a Garmin R10, a SkyTrak, a Bushnell Launch Pro, or something else. It arrived, you unboxed it, and now you're looking at it wondering what comes next.
This happens to almost everyone. The launch monitor is the obvious, exciting purchase. The rest of the setup — the software, the screen, the enclosure, the mat — is where first-timers tend to get overwhelmed.
This guide cuts through it. Here's exactly what you need, in what order, and how to think about each decision.
Step 1: Pick Your Simulator Software
Most people set up their launch monitor, hit some balls in the backyard or into a net, look at the numbers — and then realise they want to actually play golf on it. That's when they start researching software.
Save yourself the cycle and pick your software first. It affects decisions like which PC you need, whether you can use an iPad, and what kind of putting setup makes sense.
The main options right now:
● GSPro ($250/year) — best for course variety and online competition. Windows PC required.
● E6 Connect ($300–$600/year) — broad hardware support, works on iPad. Good all-rounder.
● Awesome Golf ($15/month or $350 lifetime) — easiest setup, best for casual/family use.
● Native software — many launch monitors include basic driving range or course play in their own apps. Good to start, but most players outgrow it.
One more option to have on your radar: GOLF+ Simulator is launching later this year with 40+ real-world courses, AI coaching and a robust practice facility that features guided practice and training modules. For those that own a virtual reality headset, GOLF+ will also feature a mixed reality mode to take the simulator experience to the next level. If you're in the market for a home simulator, it's worth keeping your eye on!
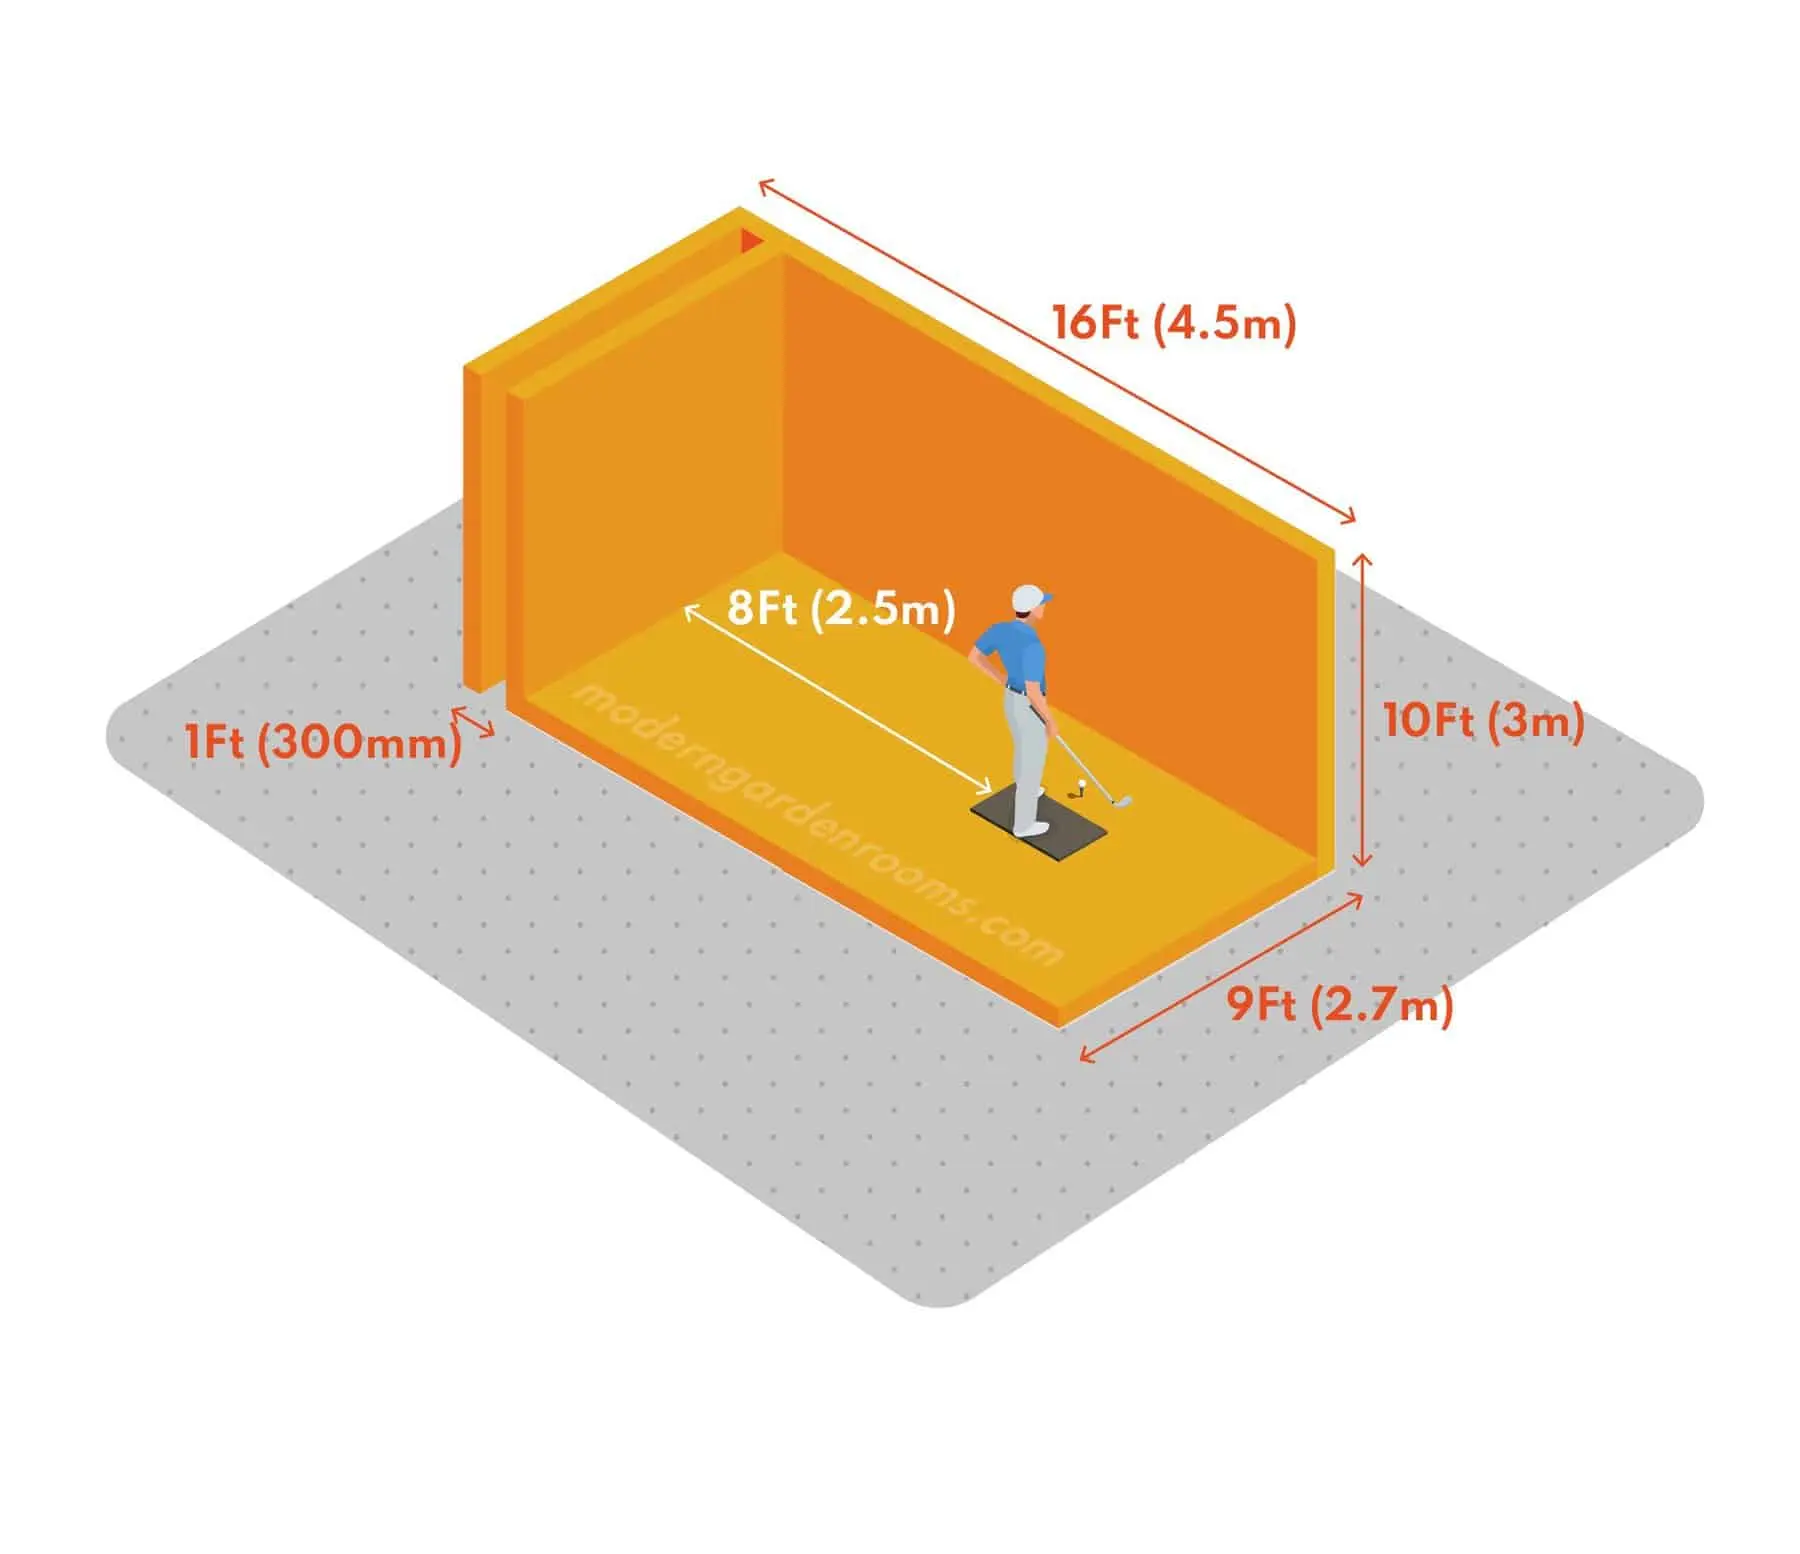
Step 2: Figure Out Your Space
This is the step that determines everything else. You don't need as much room as you think, but there are real minimums.
Minimum Ceiling Height
For a full swing with a driver, you need at least 8.5 feet of ceiling clearance at your hitting position. 9 feet is comfortable. 10+ feet is ideal. If you're under 8.5 feet, you may need to choke down and avoid full driver swings — some players do this intentionally in tight spaces.
Minimum Room Depth
You need enough room behind you to swing and enough in front for your screen and some ball flight. The typical minimum is 15 feet of total depth: roughly 5 feet behind the mat to the wall, 3–4 feet for the mat itself, and 7+ feet to the impact screen.
Width
10 feet wide is comfortable for a single bay. You can make 8 feet work, but it gets tight for left-handed golfers or wide takeaways.
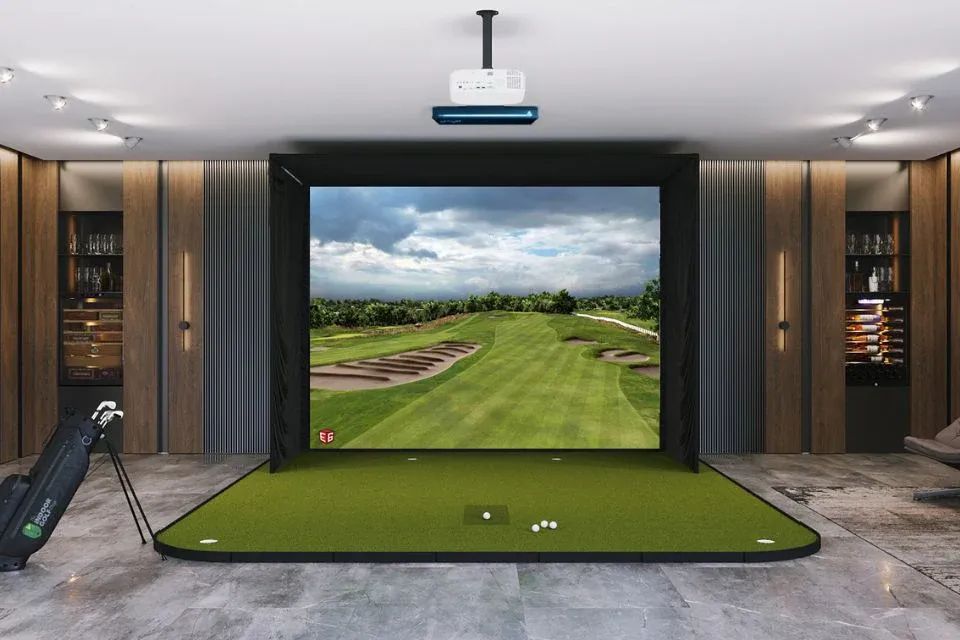
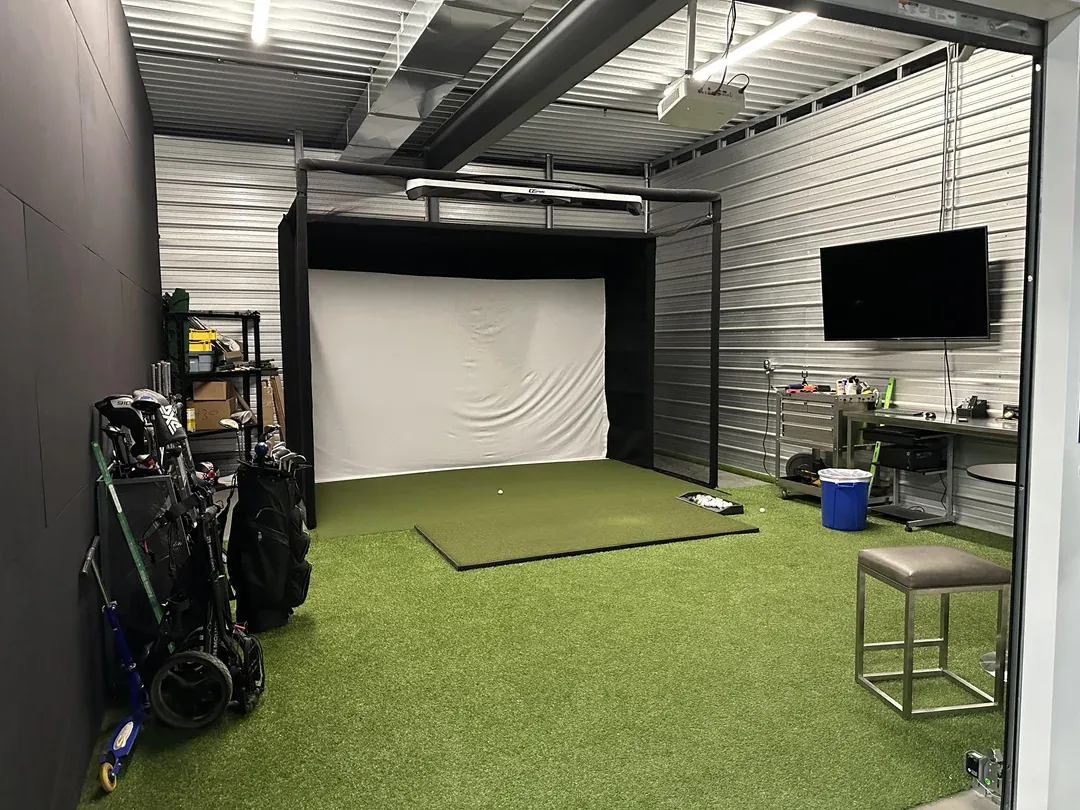
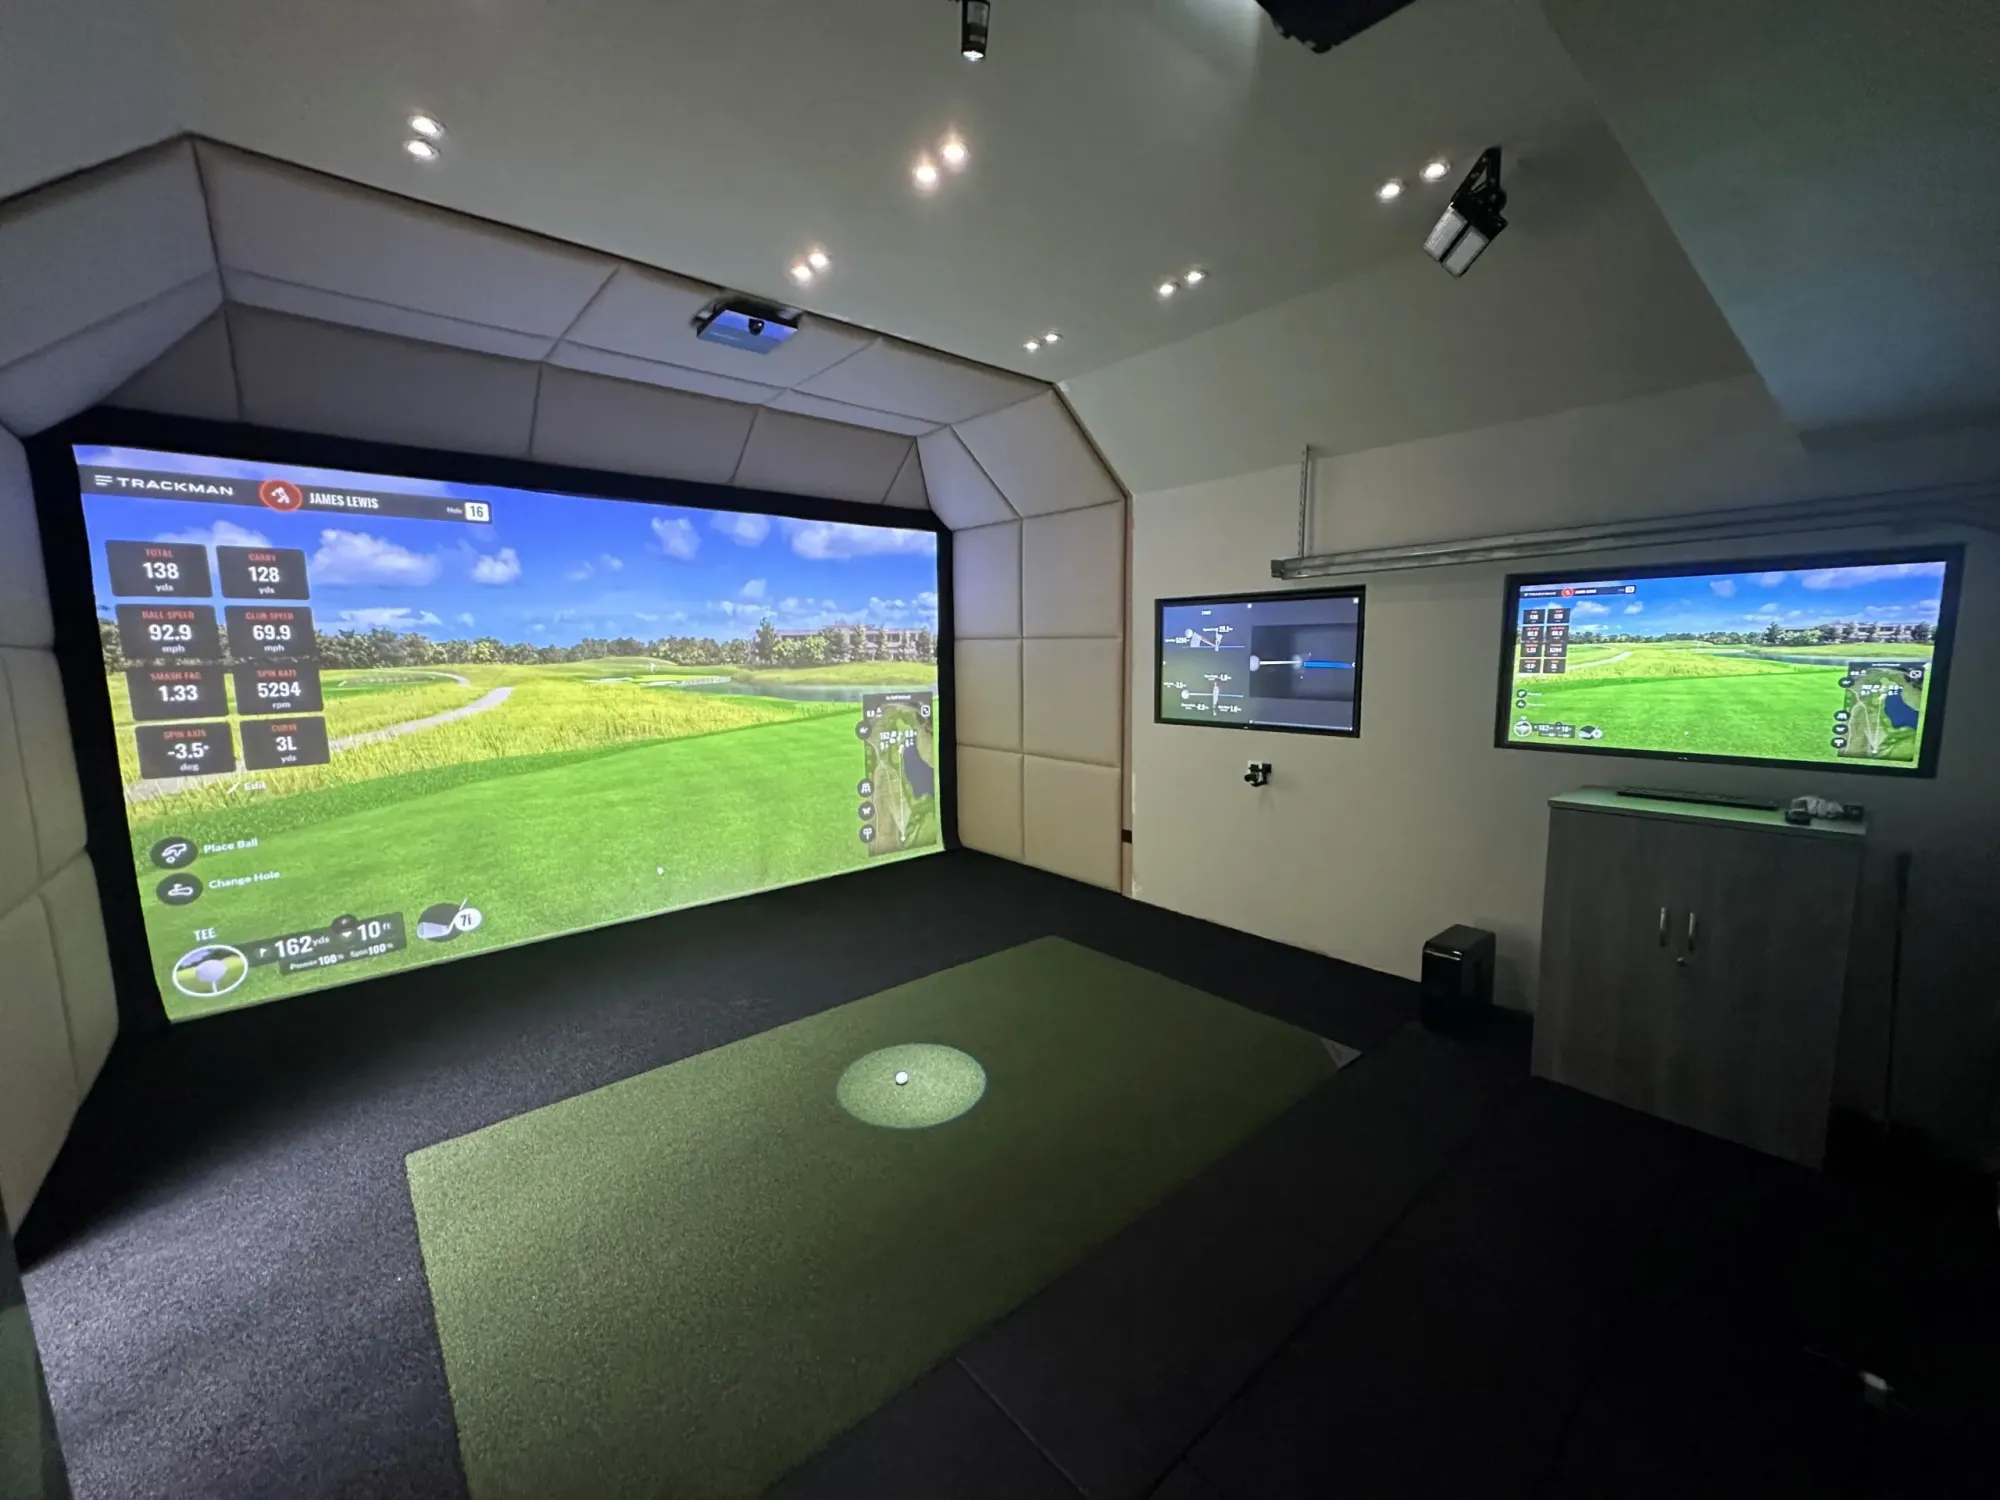
Step 3: Impact Screen and Projector
Once you know your space, you can spec your screen and projector. These two go together.
Impact Screen
The screen is what the ball actually hits, so it needs to be durable. Quality screens start around $300 and go up to $1,500+. At the mid-range ($400–$700), you can get a solid 10x8 foot screen that will handle full driver shots without damage. The most popular sizes are 10x8.5 and 10x9 feet.
You'll also need an enclosure frame to mount the screen, or a wall-mounted solution. Basic enclosure kits start around $500. Companies like Carl's Place, Rain or Shine Golf, and The Indoor Golf Shop have good options.
Projector
For a bright, sharp image, you want at minimum 3,500 lumens and a short-throw ratio so you're not projecting from 15 feet away. The BenQ LH750 and Optoma GT1090HDR are popular choices in the $600–$1,000 range. Budget projectors can work short-term but you'll notice the difference in image quality.
Key spec to check: make sure your projector's throw distance works for your room depth. A projector spec sheet will tell you how far back it needs to be for a given screen size.
Understanding the space you have available for a home simulator is crucial in choosing your setup.
Step 4: Hitting Mat
Don't underestimate the mat. You're going to be taking thousands of swings on it, so a thin, hard mat will destroy your wrists and give you no feedback on turf interaction.
The Fiberbuilt Flight Deck is the industry gold standard ($600–$900) — realistic turf feel, replaceable hitting strips, and a fibreglass base that absorbs impact. For a more budget-friendly option, the Rukket Tri-Turf mat ($200–$300) offers three different turf surfaces and holds up well under regular use.
Minimum size: 5x5 feet. Bigger is better if your space allows — 5x10 or larger gives you room to set up for different shots.
Step 5: PC or No PC?
If you choose GSPro, you'll need a Windows gaming PC. Minimum specs from GSPro are an Nvidia GTX 3060 GPU, 16GB RAM, and 10GB of storage. A capable gaming PC for these specs costs $800–$1,200 new, less used.
E6 Connect can run on an iPad, which is a meaningful advantage if you want to keep the setup simpler. Awesome Golf also supports iOS.
If you're already a PC gamer or have a capable Windows machine, this decision is made for you. If not, it's worth factoring the PC cost into your budget planning.
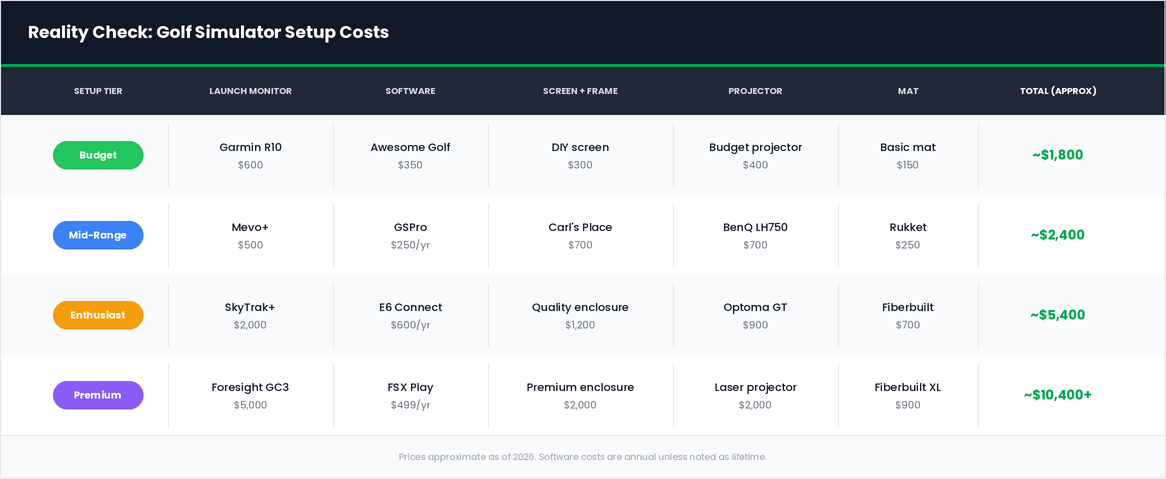
Budget Reality Check
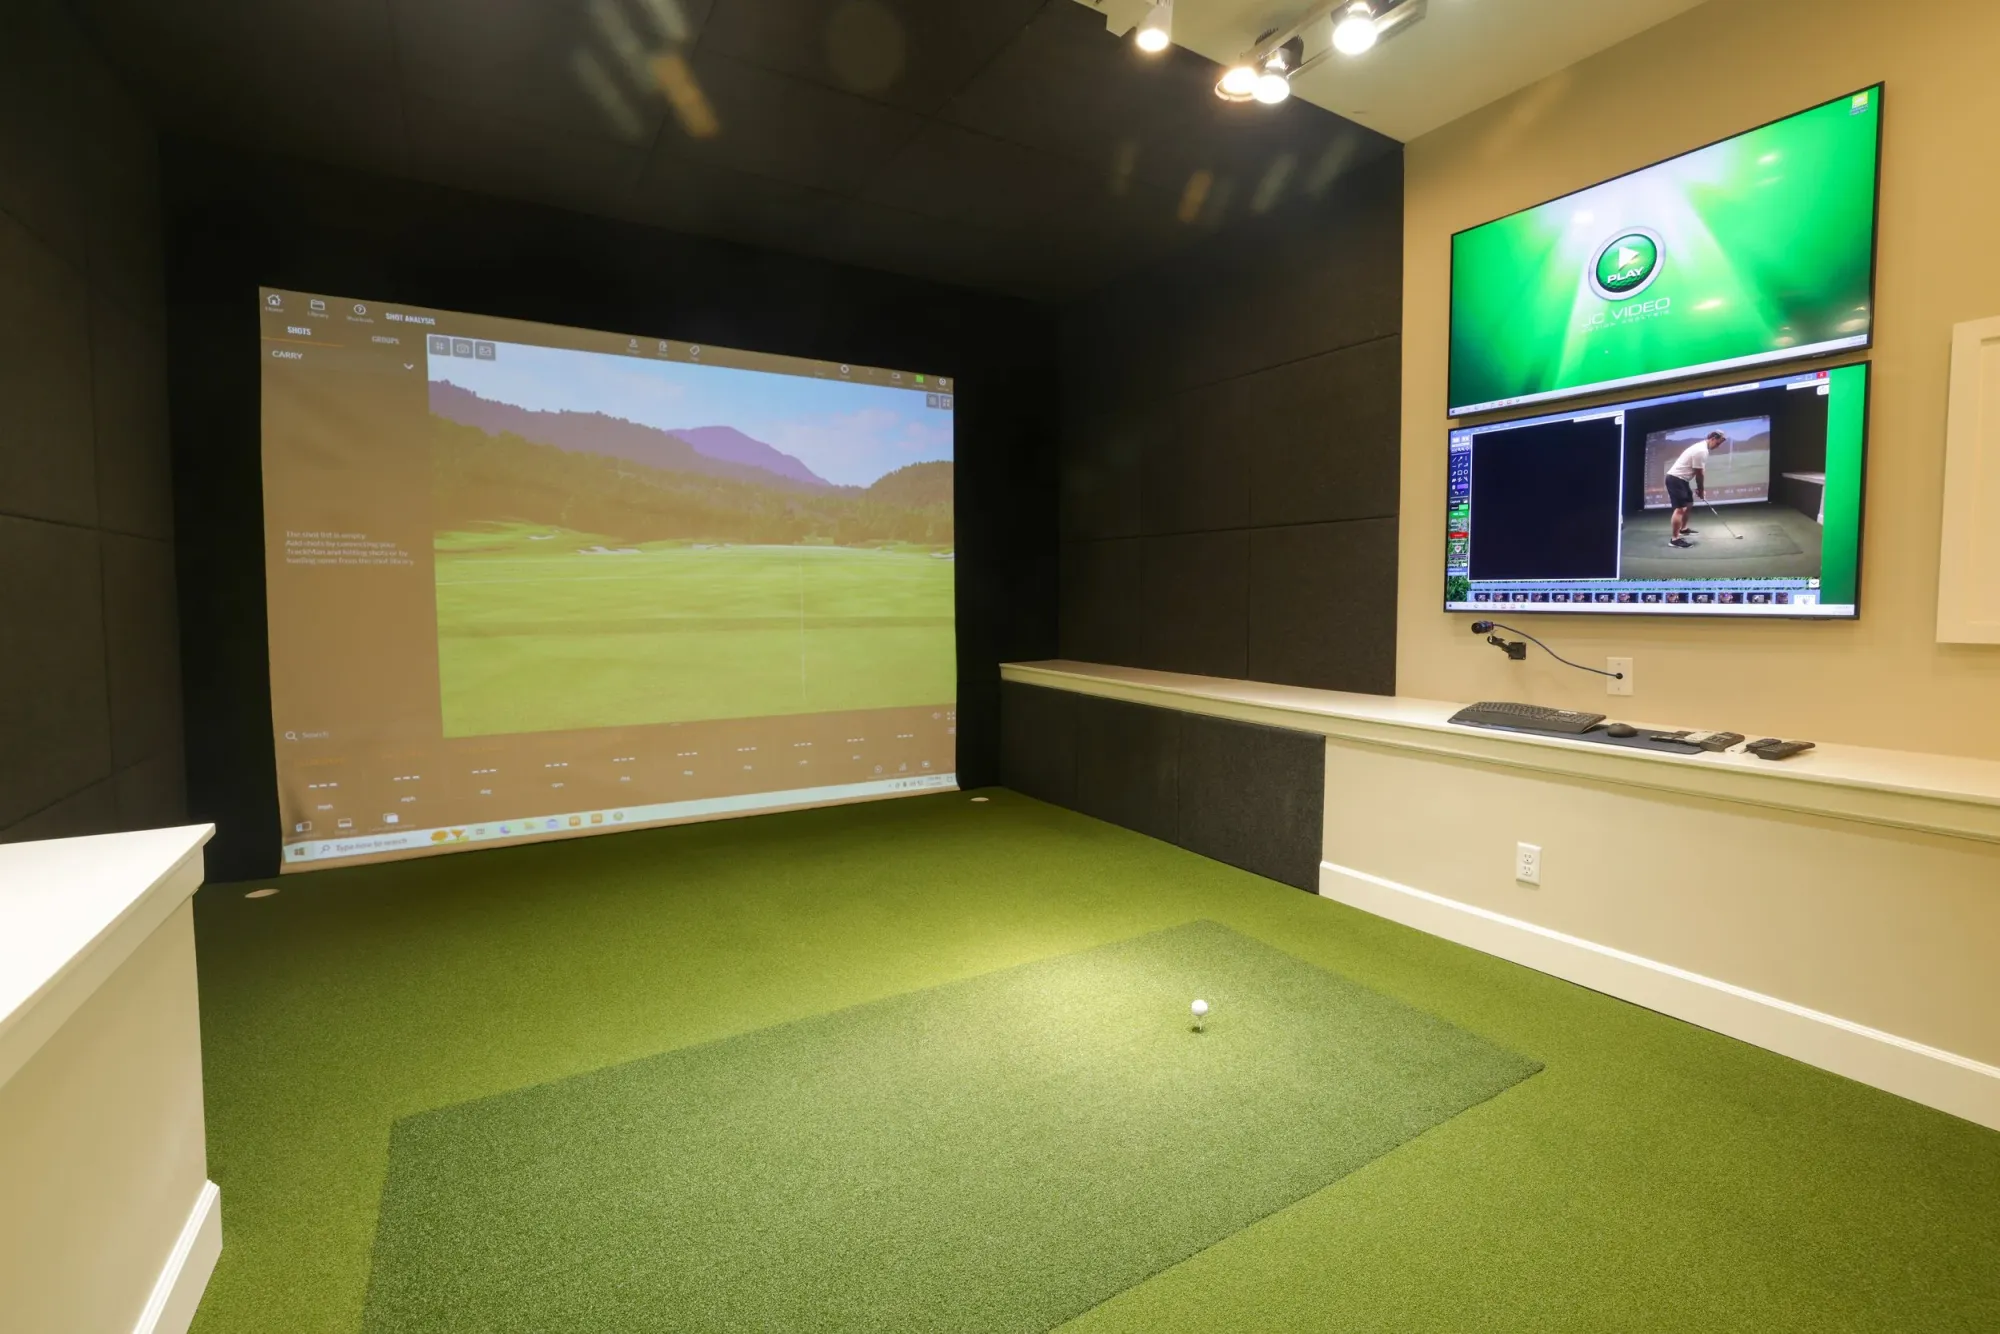
One More Thing: Putting
Here's what every setup guide leaves out: most simulator software defaults to AutoPutt, which assigns you a number of putts based on where your ball lands on the green. You don't actually putt.
For a lot of players that's fine — they use the simulator for ball striking practice and don't need to putt. But if you want a full-round experience, it's worth knowing that real putting in most simulator software is either a hassle to set up or doesn't feel realistic once you do.
GOLF+ Simulator, launching later this year, is the first software built with putting as a core feature rather than an afterthought. Something to keep in mind as you plan your setup.